Homemade Pumpkin Pie with Real Pumpkin

Lately, I’ve been reviewing our winter and summer squash at my job, SmartGardener.com,  After looking at 20 varieties of winter squash, I learned that store-bought pumpkin pie puree isn’t made from pumpkins! The common replacement is Butternut Squash, Pumpkin’s sweeter and less stringy Cucurbit cousin. That information blew my mind–does it blow yours? Re-read that, let it sink in. Pumpkin Pie Puree is made from Butternut Squash, not Pumpkins.

So what better of a reason to cut up my Casper pumpkin–from the Divisadero Farmers Market in September–and make a pie out of it? A real, honest-to-goodness pumpkin pie.

Oh, and since I’m on a personal mission to make my own crust, the following recipe will tell you how to make it all from scratch. If you’d rather not make crust (time-consuming, but worth it!) replace it with any other 9″ pre-made crust–although that packaging is not sustainable. 😉

Real Pumpkin Pie

Ingredients:

Divisadero Farmers Market
1 medium sugar pumpkin
4 eggs, lightly beaten

Pantry (Rainbow Co-Op Grocery)
2 teaspoons salt
1/2 tsp ground ginger
1 cup pastry flour (can be substituted with any white flour you have)
1 cup honey
1 tbsp cooking oil (vegetable/olive)
1 1/2 tsp ground cinnamon
1 tsp & 1 tbsp sugar

Dairy (Clover Stornetta / Straus)
1/2 cup butter (1 stick)
1/2 cup milk, and
1/2 cup heavy whipping cream, OR
1 cup half-and-half

1. (in advance) Cut up 1/2 cup butter into 1″ pieces, re-wrap, and place in freezer for an hour.

2. Set your oven to 325F.

3. Cut your pumpkin in half. Remove the seed, wash, and set aside. Drizzle inside and cut part with oil. Place into the oven until can be easily stabbed with a knife in 5-6 parts of the pumpkin, roughly 20-30 min. Do not under-cook, it will just make your life hell.

4. In a food processor pulse together:
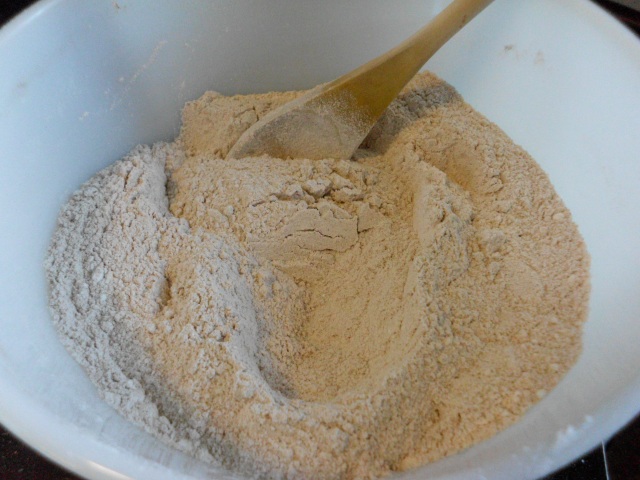
— 1 1/4 cup flour
— 1/2 tsp salt
— 1 tsp sugar

5. Add in your cut up pieces of cold butter and pulse again until it resembles coarse meal with little pea-shaped butter balls.

6. Add ice to cold water and tablespoon at a time add 6-8 tbsp ice water. I do my first three off the bat, pulse, touch it, add one more, pulse, touch it… You want it to stick together when you pinch it with your fingers.

7. Remove dough from food processor and roll into a ball. Parchment paper helps contain the mess. Pat the ball with flour, cover with plastic wrap and refrigerate, at least one hour. Time Saver: Can be made in advance and refrigerated for 2 days.

8. Once you can pierce the pumpkin and the flesh feels soft enough to mash, remove from the oven. Allow 5-10 minutes to cool before scooping out contents.

9. Turn temperature for oven up to 400F. While waiting, drizzle olive oil over rinsed and dried pumpkin seeds, sprinkle with ~2 tbsp sugar and ~1 tsp cinnamon. Put in the oven until lightly browned, ~5-10 min.

10. Scoop pumpkin contents out of pumpkin. Mash–either with a potato masher, or a food processor. I started with the former and quickly switched to the latter. It’s significantly easier.
11. Your seeds are probably done now, too. Keep the oven at 400F.

12. In a bowl, blend:
          — 2 cups pumpkin puree
          –1/2 tsp ground ginger
          –1/2 tsp ground cinnamon
          –1 tsp salt

13. Mix in:
          –4 eggs, lightly whisked
          –1 cup honey, slightly warmed
–1/2 cup milk & 1/2 cup
heavy whipping cream OR 1 cup half-and-half

14. Give yourself a break. Sit down, chill, maybe open up a bottle of beer or wine. You probably haven’t reached 1 hour for your crust…unless it’s pre-made,

15. Take crust out of refrigerator. Allow 5-10 minutes to warm up a little.

16. Sprinkle your surface with flour to prevent sticking. Roll out the disc into a circle with a 12″ diameter (I use a piece of paper long ways to measure 11″ and add 1″ to it). I prefer parchment paper for this, because your next step of getting it off your surface will be easier. Pick up, and flip over into a pre-greased pie pan. Flute the edges to look cool.
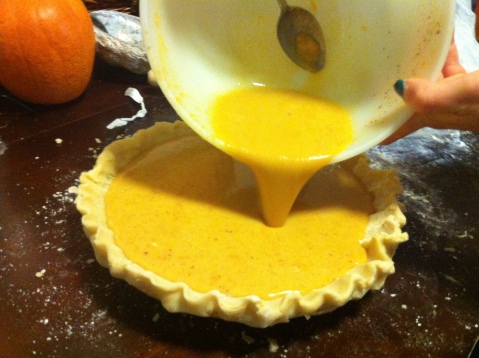
17. Pour in your pie filling.
It will probably seem really runny, and not able to become a pie. Don’t worry.
18. Bake (400F, still) for 50-55 minutes, until a knife inserted 1″ from the edge of the pie comes out clean. Allow to cool–or put in fridge/freezer to speed the cooling process up. It will look puffy, like a souffle, but that will go down as it cools.
WHIPPED CREAM TOPPING, OPTIONAL:
While waiting for it to cool, you can make your own whipped cream with heavy whipping cream, vanilla and sugar. I never measure, think of it as this: your heavy whipping cream will increase the size, your vanilla will add the flavor, your sugar will add the sweetness. Measure to your likings or needs.

The seeds are just a great snack to have while making the pumpkin, or save them and use to top the slices.


Happy Winter (Squash),

Brittany

Posted in Food, Food & Recipes, Homemade, Local, Oven, Seasonal: Fall, Seasonal: Winter | Tagged , , , , , , , , , , , | 1 Comment

Broken Oven: Stovetop Dinner Ideas

After growing up with an electric stove, I realized the wonders of gas stove tops and quickly converted. My new apartment has a gas stove, which is convenient–but what is more inconvenient is that the oven has recently quit working. I don’t know the landlord, either, so I can’t request a repair or replacement, either. I’m stuck to the confines of cooking ONLY stove top now, which is making things interesting.

No lasagna. No chicken roasts. No pulled pork. No steaks. No baked macaroni and cheese. No roasted garlic.  No frittata. No amazing cinnamon buns. No pie.
No cookie, cake, cobbler or crisp.

Well I’m now taking this as a challenge against my ability to cook and prepare innovative meals, and here are a few a great stove top meals with ingredients from the farmers market:

  1. Vegetarian Curry with Rice
    Curry paste & mixed vegetables from Fillmore Farmers Market, Scrounged rice.
  2. Veggie Tacos with Cilantro Lime Rice, Black Beans and Homemade Salsa Verde
    Tomatillos, Avocados and other vegetables from Farmers Market.
  3. Sausage and Kale over Fusilli (Alice Water’s recipe)
    Wanted to make a nice dinner, so I flipped through The Art of Simple Cooking and found this recipe. I had all the ingredients, it was meant to be.
  4. Ratatouille
    Given 2 eggplants at the end of the Farmers Market, so we knew it was time for Bobby to make us Ratatouille. This time he used Alice Waters’ recipe.
  5. Watermelon Salad
    After working the Local Bites event at the California Academy of Sciences, I went home with a bunch of displays and produce, including two heirloom watermelons. I gave one to Paul, who was headed to a Salmon BBQ, and brought one home to make a caprese-like salad, inspired by the watermelon skewers I tried from Taste Catering’s stand.
  6. Fried Chicken with Mashed Potatoes and Sauteed Collards
    I felt like when I mentioned I was making this for dinner everyone could tell I was from the South (Yes, Maryland was below the Mason-Dixon, my friends). Bobby loves Collards, so I figured we could partner up on this dinner. Oh my god. BEST chicken I’ve ever had.

I hope this helps you if you’re without a broken oven, or if you’re considering a faster meal than 25 minutes at 350F. Recipes available upon request.

Happy (Stovetop) Cooking,
Brittany

Posted in Food, Food & Recipes, Homemade, Local, Stove Top | Tagged , , , | Leave a comment

Bobby’s Awesome Zucchini Bread

Bobby and I were working in the USF Garden over the summer, so we’ve been pretty spoiled with the summer harvest. The summer squash is no disappointment, either. Our plot at the last work party yielded 7-8 zucchinis for our wonderful volunteers, and Bobby and I have been enjoying the wonderful veggies in many things. This recipe is by far our favorite thing to do with them, though.

This bread is awesome, and I’m not just saying that to flatter my boyfriend. Maybe it’s the pan, or the combination of flours, but the texture on this zucchini bread cannot be out done! The crunchy top crust gives you a satisfying texture right before you sink your teeth into the soft, spongy middle. Please, try it with your summer zuke’s before they’re out of season!


Bobby’s Awesome Zucchini Bread

Ingredients:

– Organic White Flour: Rainbow
– Organic Wheat Flour: old Trader Joe’s purchase
– Vanilla Extract: scrounged from friend moving out
– 3 organic Eggs: Olivera Farms at Fillmore Farmers’ Market–two of our eggs had red spots, which prompted me to immediately search online to see if it was safe to eat. It is–the blood spots actually indicate a fresh egg. Since we got ours from the Farmers’ Market, that makes sense.
2 medium organic Zucchinis: Grown in USF Garden
White Sugar: Rainbow
– 
Baking Soda: Rainbow
– 
Baking Powder: Rainbow
Organic Cinnamon: Faletti’s
Vegetable Oil: Safeway (Roommate’s…)
– Salt: Rainbow

Process:

  1. Preheat the oven to 325°F
  2. Mix together 3 eggs, 2 tbsp vanilla, 1 cup vegetable oil and 2 cups sugar in a large bowl. Bobby accidentally used a small bowl for this, do not attempt at home unless you want to clean up your surface from an egg/oil/sugar disaster.
  3. In a separate smaller bowl mix together 1 1/2 cup whole wheat flour and 1 1/2 cup white flour with 3 tsp cinnamon and 1 tsp of each: salt, baking soda, and baking powder.
  4. Combine the two bowls, smaller into the larger.
  5. In your now empty smaller bowl, grate 2 cups of zucchini into the bowl. Once you achieve 2 cups of zucchini, add it to your large bowl and mix all the ingredients well.
  6. Grease your baking sheet.
  7. Pour mixture into a 13″ x 9″ gray cooking pan and cook for 40-60 minutes, checking for a clean tester. Let cool for 20 minutes.
“Making zuchinni bread will seriously give you a workout!”  -Bobby


Abundant Harvests,
Brittany

Posted in Food & Recipes, Homemade, Local, Seasonal: Fall, Seasonal: Summer | Leave a comment

Sunday Brunch from the Farmers Market

I recently moved from 31st Ave–deep in the Richmond–to Divisadero Street: the new SF hotspot, poppin’ with art walks, fun bars, and some bomb food for all hours of the day. Sunday Brunch is probably the most popular, especially if hung over and craving sustenance. Eddie’s is right by my house, as is Bean Bag Cafe, Blue Jay Cafe, and Herbivore. While I have gone to each for food at least once, nothing can compare to the homemade goodness of cooking right after shopping the Sunday farmers market.

Divisadero Farmers Market has always been one of my favorite markets, and taking the 5-Fulton every Sunday got to be cumbersome–but still a chore I was happily willing to do. But I’m not complaining about how I can see the market from my stoop, and a quick run back for a forgotten ingredient is possible. Now the market contributes to about 6/8 of my diet, and most meals are made completely from local ingredients.

To give you an idea of how Bobby and I are cooking for 2 from the farmers’ market, here’s our shopping list:

  • 3-pack: 2 golden raspberries, 1 raspberry (all organic) — $15
  • 5 yellow onions,
    1 red onion,
    1 red bell pepper,
    1 green bell pepper,
    1 pack cherry tomatoes,
    3 heirloom tomatoes,
    1 bag arugula (all organic) — $10
  • 2 bunches of kale, 1 bunch rainbow chard — $15
  • 3 organic avocados — $6, 2 organic avocados (not perfect) — $1
  • dried bing cherries, onion almonds, sesame glazed walnuts, 2 yellow peaches, 1 plum — $15
  • Italian Goodies: 1 garlic Parmesan cheese spread, 1 Mediterranean olive mix, North Beach mix — $13
  • 1 Sourdough Round, 4 sandwich rolls — $7-8
  • 3 pieces of corn — $1
  • Bouquet of flowers –$4, and 2 free geraniums of my choice!
  • 6 pack of white eggs — $2
  • 1 Olallieberry pie — $8.50 (end of the day sale)

Total amount spent on food: $94.5 for 2 people! Which equals ~$50 a week on food, or two days spending $25 eating out at cafes and restaurants.  Not too shabby. Especially because this food will last us through the week providing breakfast, lunch, snacks and dinner. Of course, we usually grab a couple spare items from the store, like milk, cheese, and other items not sold at the farmers market or too goddamn expensive.

Sunday Brunch

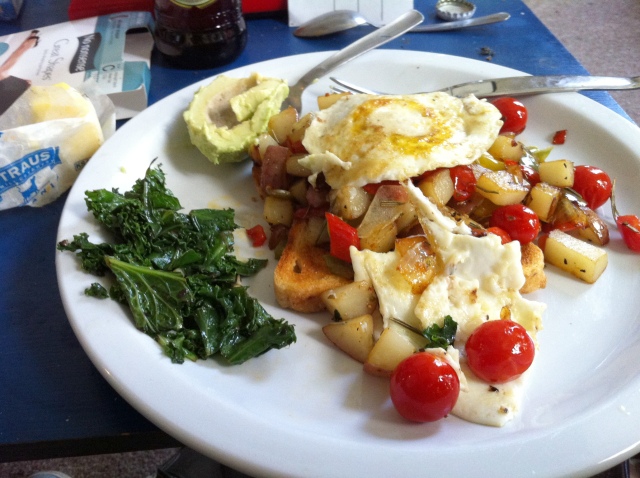
Vegetable Skillet  (Potatoes, Onions, Cherry Tomatoes, and Bell Peppers), topped with a Sunny-Side Up Egg. Served with a side of Kale and Chard Sauté, Sourdough Toast, and fresh Avocado.


Bobby and I have two approaches to eating, which makes plating pretty interesting. I prefer all my parts separated, and mixed when I please. He prefers everything piled together for a open-face style sandwich. No matter how you combine your ingredients, the fresh flavors are sure to satisfy!

Until Dinner,
Brittany

Posted in Food, Food & Recipes, Homemade, Local, Seasonal: Summer | Leave a comment

Steamed Artichokes with Garlic Aioli

Summertime is the best time in the garden. Oregon Giant peas drip off the vines, collapsing under the weight of the fruiting bodies. Strawberries and raspberries blush reds hidden amongst all the deep green hues. And the artichokes! Two to three heads are forming on each perennial, and my diet consists of steamed artichokes at least once a week. This aioli I made out of desperation to find something easy to make in barren kitchen–and Bobby claimed it to be “the best aioli he ever had.” Thank you, Bobby. 🙂

Steamed Artichokes with Garlic Aioli

What You’ll Need:

  • 1 Artichoke per person
  • Mayonnaise
  • Organic Lemon (Inzana Ranch)
  • Garlic (Farmers’ Market)
  • Salt and Black Pepper

Check out these beautiful organic, homegrown artichokes! The BEST I’ve ever eaten!

Artichoke: You will need a steamer to steam these bad boys up. Honestly, I have no clue what I’m doing when I steam my artichokes. I put them in a pot with a steamer, and fill it with water until it’s visible in the steamer’s bottom holes. I put my artichokes on the rack, cover the pot with a lid, and set to high on the stove for ~30 minutes. I check numerous times to see if the bottom peels off easily and if the flesh is edible–sometimes this means adding more water or thinking it’s ready when it’s not. Read this for more detailed steaming information. In the beginning stages of your steaming process, begin to make your aioli, so it’ll be cold at the end.

Aioli: Add as much mayonnaise as you think your people will need. I love dip (especially aioli) so I took out three large heaps with a table spoon–the kind that mingles with forks and knives. Then I used the heel of my hand and rolled the lemon to juice it up up. Cut in half and squeeze until the consistency of your aioli is creamy; I used half a lemon. Mince 1 garlic clove, add to the mix, grind in black pepper and salt and mix together. Chill in refridgerator until artichokes are ready. Viola!

Enjoy Your Harvests,
Brittany

Posted in Food, Food & Recipes, Homemade, Local, Seasonal: Fall, Seasonal: Spring, Seasonal: Summer, Stove Top | Tagged , , , , , , , | Leave a comment

Poppa George’s Winter Bolognese

Each winter I venture across the country to Maryland to visit my friends and family. With my Abuela Marina’s and Poppa George’s birthdays falling around my Mom’s birthday, Winter Solstice, and Christmas all in December we all get together to celebrate the holidays and our family. My grandfather always prepares this Bolognese sauce recipe, and I was always curious where he got the recipe from—and if it had ventured with my family out of Italy.

“Unfortunately the story is not very exciting, ” my grandpa started. In a reply back (below) he noted how my grandmother Marina discovered the recipe in my Italian great-grandmother’s house.

The message of this recipe quickly became a conversation about food and family. Poppa George enjoys making this as a traditional winter meal because,  “it’s as good as there is.”

This recipe, although not directly from my great-great-grandmother, does remind my grandfather of his grandmother, Marina.

This memory of his grandmother–my Italian relative–reminds me of the classic Italian meals that I researched when studying the food culture of Italy. As things  travel they also morph and evolve. When she came to San Francisco she opened the Monte Carlo restaurant, where she showed off her culinary expertise. She only cooked for the family on special occasions, and was a natural cook who could pull anything off. Unfortunately, I have never had the experience of cooking with Marina, or my great-grandmother Rita. Through this recipe I can only imagine what her recipes tasted like at the Monte Carlo–and for the first time, since previously I was a vegetarian before becoming a sustainivore.

Bolognese Meat Sauce

Marcella Hazan from Essentials of Classic Italian Cooking

1. Make your soffritto. Combine

  • 1 Tbs olive oil
  • 3 Tbs butter
  • 1/2 C. chopped onion

Once onions are translucent, add

  • 2/3 C. chopped celery
  • 2/3 C. chopped carrot

And cook for a couple more minutes, making sure to coat the celery and carrots in oil. Add,

  • 3/4 pound ground beef chuck**–Poppa George claims that the fat in the chuck is far better than lean ground beef. Chef Hazan also recommends pork in addition.
  • large pinch of salt
  • couple pepper grinds

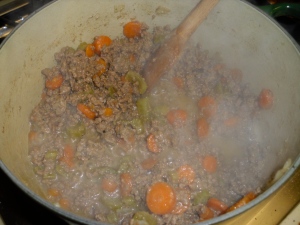
Break up the meat and stir everything well. Let meat brown, then add,

  • 1 C. whole milk

Let the milk simmer out.

before.

after.

Add in

  • 1/8 tsp. grated nutmeg, stir

Add,

  • 1 cup dry white wine–I used Pinot Grigio from Italy, cause I felt it would make it more authentic.

Simmer down, again, similarly to the milk. While simmering, chop

  • 1 1/2 cup (~12 oz.) canned Italian plum tomatoes, cut in with their juice. I suggest San Marzanos.

Stir the tomatoes and juice into the meat, and mix in well. Let this come to a boil, then reduce the temperature to a low boil and allow to simmer for three hours. Yeah, three hours! So pull out a book, maybe snack on something else around the house (dried pluots, anyone?), and maybe clean up your dirty dishes from earlier. Remember to stir every so often.

At the end of the three hours, no water should remain, and the fat  separated from the sauce. Along the way, though, if it does begin to dry out and the fat seperate, stir in 1/2 cup of water.

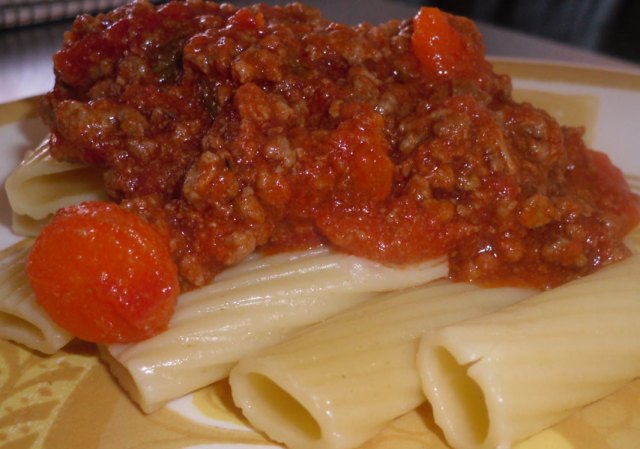
Taste and correct for salt. Garnish with freshly graded parmigiano-reggiano cheese on top of Ziti pasta. Well, you can use any kind of pasta, but Poppa George always serves Ziti.

This recipe, and food in general, has allowed for my grandfather and I to bond. When I began at the University of San Francisco our relationship was rocky, with family politics complicating everything. Through my new love for food, gardening, and sustainability my grandfather and grandmother and I have been able to find common interest. The most epic of our “foodventures” was definitely  when we went to Chez Panisse in Berkeley, CA for lunch. Although a short trip across the bay, I had never been to Berkeley before and that trip, and it really opened up my mind to the food culture beyond the bay. I’m hoping that for my graduation we’ll be able to go back to Chez Panisse again, and hopefully run into Alice this time!

**note: this recipe was not intended to promote eating meat as a form of sustainability. I strongly feel that a beef-laden diet, typical of modern America, is not environmentally sustainable, nor good for your body entirely. However, I feel that cultural sustainability is equally as important as the environment. While I could have made Abuela Marina’s vegetarian guacamole, the lack of tomatoes and avocados in season at the Farmers’ Market caused hesitation. Just know this, a Sustainivore is constantly assessing the impacts of the food they eat. This meal features chuck purchased at Faletti Food’s from Five Dot Ranch. I tried to buy the most local, sustainable chuck possible for this meal that satisfied the recipe, my wallet, and my eating preference.**

Posted in Food, Food & Recipes, Homemade, Seasonal: Fall, Seasonal: Winter | Tagged , , , , | 10 Comments

SF Spring Salad

The Farmers’ Market is abundant with all sorts of fruits and nuts…oh, and there’s great fresh produce to buy, too! Today’s simple salad recipe includes 3/4 Farmers’ Market freshness. Until I find a goat cheese supplier, I’m stuck buying mine from stores.

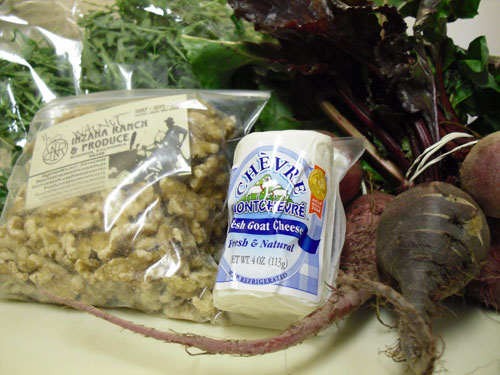
This is where I got my Goat Cheese from. The cheese itself is from Wisconsin.
This is Divisadero stand that sold me my arugula and beets.

Beet, Arugula, Goat Cheese and Walnut Salad

Ingredients: Arugula & Beets (Ibarra Organics), Organic Walnuts (Inzana Ranch), and Goat Cheese (Arguello Market – from Wisconsin), Organic Olive Oil & Organic Balsamic.

This is all you’ll need for your salad.

1. Preheat oven to 350F. Arrange walnuts evenly across tray and toast for 8-10 minutes, checking on them occasionally. You want them to be a golden brown color. Allow to cool.

Toasted walnuts on right compared to raw nuts on left.

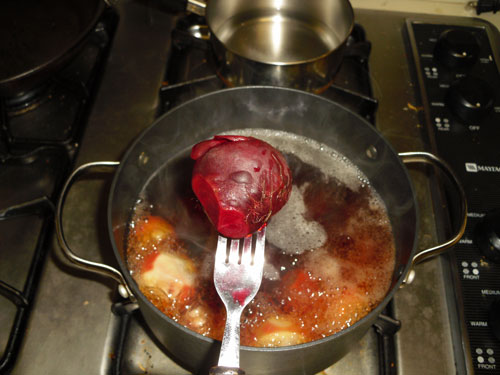
2. Boil a pot of water. Once boiled, place in beets with greens removed (either use for another meal or compost). I’m honestly a novice beet user–so I cut off the roots and things, too.  Anywho, boil yer beets until a fork can puncture them.

3. Mix olive oil and balsamic vinaigrette. If you’ve got a lemon you can juice, add that in, too! Stir or shake depending on container; I prefer mine shaken, not stirred.

4. Put freshly washed arugula greens in bowl. Once beets are cooked, allow them cool and dice into preferable-sized chunks. Add to bowl with arugula. Coat with oil & vinaigrette dressing and toss.

5. Top with toasted walnuts and chunks of goat cheese. Some people get crafty and chop their walnuts and roll balls of goat cheese around in them. I say: do whatever your heart desires!

Salad fit for a sustainivore!

At this point you probably think I’m crazy for declaring this a recipe. How much arugula? How many beets? I just try to estimate based off how many people I expect my meal to feed. For my Green Media class I’m feeding 11, so I used one bag of arugula, two bunches of beets, and enough walnut and cheese until I felt content. As for the dressing: mix it in, and if there’s not enough to coat it all make some more. Who’s going to know if there wasn’t enough at first?

Abundant Harvests,
Brittany

Posted in Food, Food & Recipes, Homemade, Local, Seasonal: Spring | Tagged , , , , , , , , , | Leave a comment

Curried Lentils & Rice

If you’re the kind of person that likes a good, wholesome meal but doesn’t have the patience to stand over a stove to cook, nor the money to spend on a bunch of ingredients, and also want a meal that requires little cooking skill beyond chopping onions and garlic—well then this is the recipe for you!

If Bobby and I are cooking for a big group—ranging from potlucks to a gang of skater boys—this recipe always comes in handy. It’s best for the last-minute crowd of dinner guest too, with the versatility to use broth (which gives it more flavor) or water.

Curried Lentils & Rice

1. Begin your rice with the simple ratio one part rice to two parts water. I honestly cannot estimate how much rice will come out and always end up making more then necessary, so use your best judgment. A good rule is to always good to have more then less. Depending on the rice you use (brown, jasmine, Uncle Ben’s…) you might want to do this once your lentils have begun cooking already.

2. In a large pot add 3 cups vegetable broth (or water) and 1 cup lentils. For this I used the left over broth from the Vegetable Pot Pie and added water to get to the right amount. (Another great thing about this recipe, you can improvise with water if you overestimated your stock.)

3. Dice 1 onion and mince 1 clove of garlic, then add to the pot.

4. Season with 3 tablespoons of curry powder, 2 bay leaves, and salt and pepper to taste. You could also substitute two whole black peppercorns for the pepper itself.

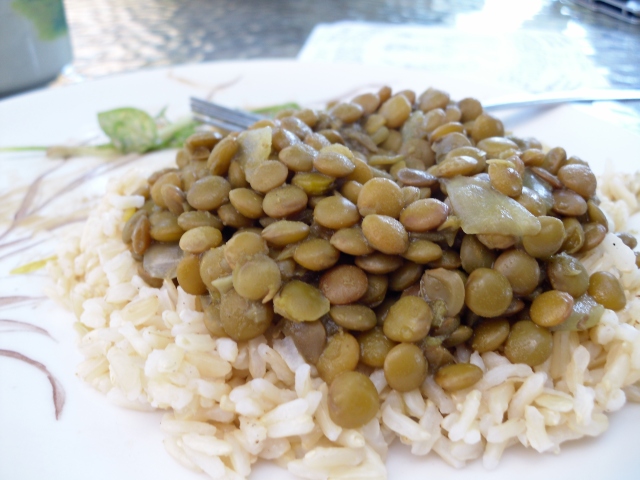
5. Let simmer for 40-50 minutes until the lentils are a nice texture. Remove the bay leaves and peppercorns (if used), and serve over rice.

Note: We typically double this recipe if serving for a large group, of if you want something easy to take to school or work for lunch that can be reheated in a microwave.

Cozy Eating,
Brittany

Posted in Food, Food & Recipes, Homemade, Seasonal: Fall, Seasonal: Winter | Tagged , , , , | Leave a comment

“The Most Amazing Cinnamon Buns Ever”

The idea was originally inspired from ohChloe’s blogpost about cinnamon rolls. However, when I went to replicate her recipe her post could not be found to save my life–until now (of course–isn’t that how it always works?!).

While searching the web for a back-up cinnamon roll recipe the name Absolute Best Cinnamon Rolls Ever sold me–although no pictures accompanied them (as Chloe’s did not lack). Now they have a photo recipe! When I found ohChloe’s recipe it was funny because she used almost the same recipe I did. Coincidence?

This photo recipe was a homework assignment for David Silver’s Green Media class.
Please click on the image below to view the photo recipe!

Sweet Dreams,
Brittany

Posted in Food, Food & Recipes, Homemade | Tagged , , , , , | Leave a comment

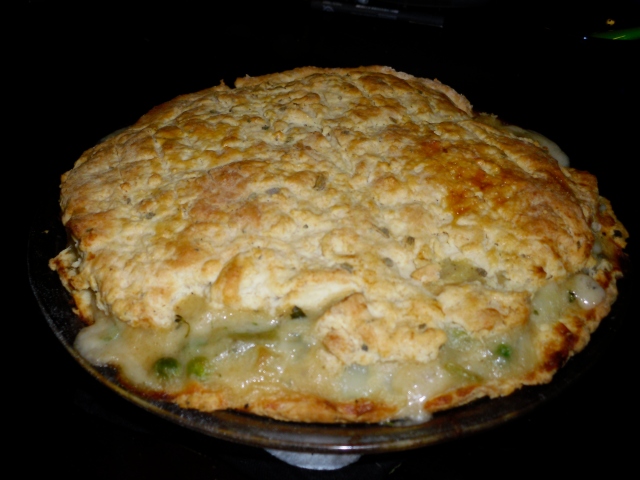
Homemade Vegetable Pot Pie with Sage Crust

With the new year comes highly unattainable goals with good intentions. One of my ambitious resolutions was to make a new meal every week of the total fifty-two. It sounds great, exploring new cuisines and culinary skills regularly…however, my timing did not take much into consideration. Case in point: Week 2 where I caught the cold and lay sick in bed not even wanting to eat. I did, however, manage to bust out this great pot pie on my first week of yeah!-I’m-doing-this! attitude.

The pot pie itself is a recipe from a chicken pot pie recipe that sounded amazing and a couple of vegetable pot pie recipes (in print and web) for guidance on the filling. All the ingredients are San Francisco fresh, mostly coming from the farmers’ market or Rainbow Co-op–a sharp contrast from all the frozen pot pies I’ve eaten my entire lifetime. In fact, this is my first homemade pot pie ever eaten. This recipe is perfect for all the fresh ingredients from the fields of surrounding agricultural lands, in addition to something delicious to make when stuck inside from the cold and rain.

Homemade Vegetable Pot Pie with Sage Crust


1 – Preheat the Oven to 350˚

2 – Start Your Broth

I make a large batch of broth to use throughout multiple recipes. Here’s the broth I made for this recipe, and canned to store for future cooking. Basically use whatever vegetables you have near going bad, or use the awkward parts of vegetables. For this recipe I added celery stalk tops with leaves, and potato and carrot peels to the stock while preparing the other vegetables for the filling.

  • 1 whole onion, diced
  • 10 small carrots
  • 4 celery stalks
  • 3 garlic cloves, peeled and pressed (leave whole)
  • ¼ cup lentils
  • 1 bay leaf
  • 1 tsp thyme
  • fresh parsley
  • 8-10 cups water
  • 1 tbsp oil
  • salt and pepper to taste

The amount of water you add is relative to how many vegetables you put in your stock, make sure they’re floating. I prefer to use the biggest pot in the house for this process.

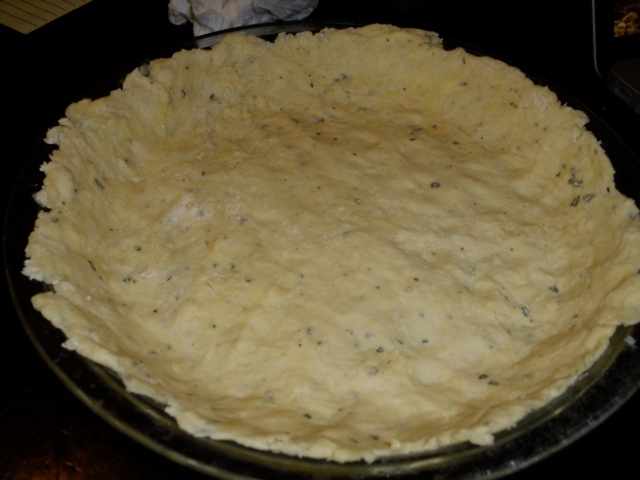
3 – Make the Sage Crust

Mix together:

  • 1 cup organic pastry flour (Rainbow co-op)
  • 1 tsp dried sage (USF Community Garden)
  • 1/8 tsp salt (Rainbow co-op)
  • 2 tsp baking powder (Rainbow co-op)

Stir and add in

  • 1/3 cup organic milk (Straus, Rainbow)
  • 2 tbsp butter. (Straus, Rainbow)–Leave chilled in refrigerator until this process. Separate into chunks and add to bowl.

Mix with fork, then begin getting frisky and just using your hands to blend into a ball to roll out.

If you have a rolling-pin now would be the time to grab it. If not—like me—just use a sturdy glass cup. Flour your surface and pin/dough before rolling so things don’t get sticky and complicated.
Once in a nice round shape place the dough into a greased 9” pie dish. I stretched mine out around the pan.

Mix up one egg in a bowl and coat the top of the bottom crust.

Make another ball of this and set aside for your top crust.

4 – Fresh Filling

Boil water and add

  • 1 potato, peeled and diced (Russet, Divisadero Farmers Market).

Add

  • 1 cup carrots, peeled and diced (Divisadero Farmers Market)
  • 1 cup frozen peas (Organic bag from Rainbow)

Boil for about 3-4 minutes, then drain and set aside. Begin sautéing your onions by melting

  • 2 tbsp & 2 tsp butter (Straus Organic, Rainbow)
  • 1/3 cup, onions, diced, until translucent (Divisadero Farmers Market)

Add

  • 2 stalks celery, diced (Falletti’s Foods)
  • 2 small broccoli heads (Divis Farmers Market)

And cook for another couple minutes, until the celery is softer. Then begin making the creamy filling by stirring in

  • 1/3 cup flour
  • ½ tsp salt
  • ½ tsp pepper
  • 1/4 teaspoon celery seed, or minced celery leaves

Once combined, stir in

  • 3/4 cup vegetable stock made previously
  • 2/3 cup milk

Let simmer on medium-low heat, this was 5 on my stove, stirring occasionally until it becomes thick. Remove from heat and add to boiled vegetables from earlier. On the egg-glazed crust, pour your filling on top. Once spread throughout the filling, roll out and coat in beaten egg the other crust prepared earlier. Cover, egg-side down, on the pie, and connect the edges together. Glaze the top with the egg mixture and place in oven for 30-35 minutes, until crust golden and filling bubbly. Wait to cool for 10 minutes, and enjoy!!!

Gastronimically Yours,
Brittany

Posted in Food, Food & Recipes, Homemade, Local | Tagged , , , , , | 4 Comments